
How to Choose Foundation for Your Skin Tone (No More Mismatches)
Foundation is the most returned product in beauty — and the reason is simple: most people buy the wrong shade, the wrong undertone, or the wrong formula, then wonder why their face looks like a mask in daylight. Choosing foundation for your skin tone is part colour science, part honesty about your skin, and entirely learnable. Here is how to get it right without wasting money on a drawer of almost-right bottles.
Step One: Find Your Undertone (Not Your Surface Colour)
This is where nearly everyone goes wrong. Your skin’s surface colour (fair, medium, deep) is obvious; your undertone — the subtle hue beneath — is what foundation must match. There are three: warm (golden, peachy, yellow hints), cool (pink, red, blue hints), and neutral (a balance of both).
Three quick tests, done in natural daylight: The vein test: look at your wrist — greenish veins suggest warm, bluish-purple suggest cool, a mix suggests neutral. The jewellery test: does gold flatter you more (warm), silver (cool), or both equally (neutral)? The white test: hold pure white fabric near your face — if your skin looks yellowish against it, warm; pinkish, cool; neither strongly, neutral. No single test is definitive; two out of three agreeing is your answer. Getting this right eliminates about 70% of foundation mismatches at a stroke.
Why this matters more than the shade number
A “medium beige” in warm undertone and a “medium beige” in cool undertone are different colours. Buying by depth alone — “I’m about a medium” — is why foundations look orange (too warm) or ashy (too cool) in daylight. Match undertone first, depth second. It is the closest thing to a cheat code in makeup.
Step Two: Match in Daylight, Not Store Lighting
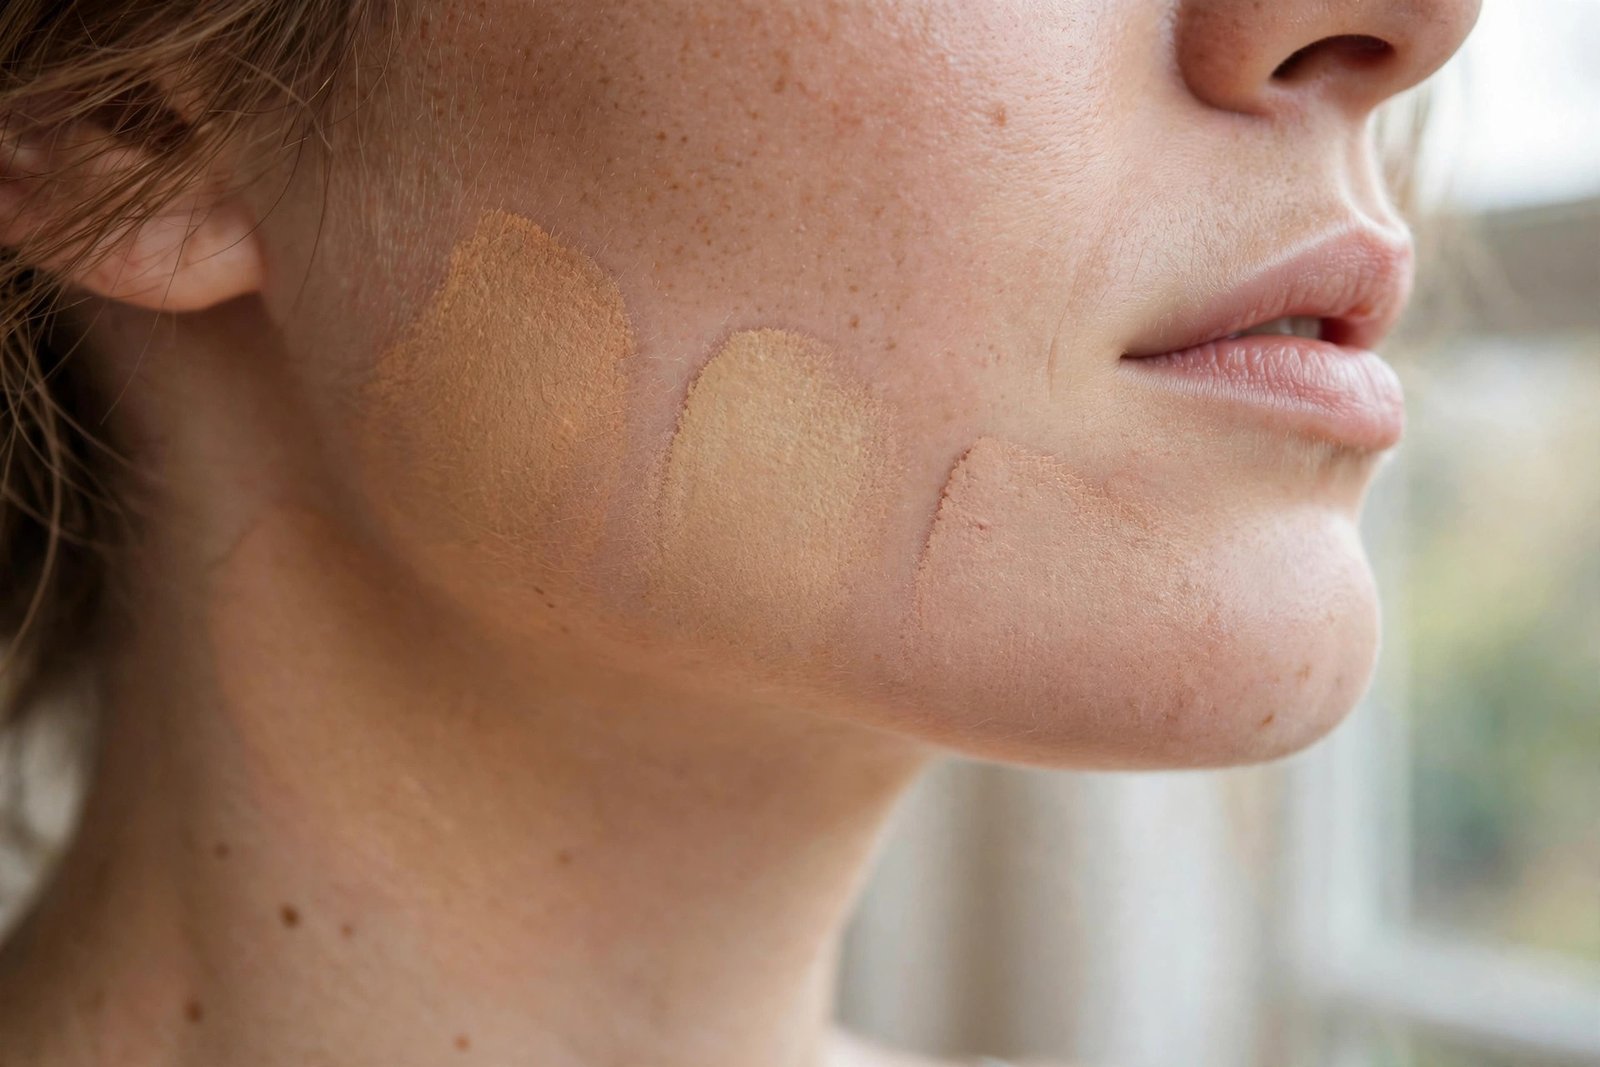
Department-store lighting is engineered to make everything look good, including the wrong foundation. The method that works: swipe three candidate shades in a stripe along your jawline (not your hand — hands are a different colour), step outside or to a window with natural light, and check which stripe disappears into your skin. The right shade vanishes; the wrong ones sit visibly on top. Give it five minutes — foundations oxidise slightly as they dry, and the colour in the first thirty seconds is not the colour you will wear.
Do not let anyone colour-match your forehead or cheek alone — faces have multiple tones, and the jawline/neck junction is where a mismatch shows most brutally in photographs. The goal is seamlessness between face and neck, not a perfect match to one cheek. And be honest about self-tan: if you fake-tan, match to your tanned tone or keep two foundations (one for each state) rather than one that matches neither.
Step Three: Choose the Right Formula for Your Skin
Shade is only half the battle — formula determines whether it looks like skin or like makeup. Oily skin: matte or oil-free liquid foundations, or powder foundations; avoid dewy finishes that slide by noon. Dry skin: hydrating, dewy or serum foundations; matte formulas cling to dry patches and age you. Combination: a natural-finish liquid, possibly with powder just on the T-zone. Mature skin: lightweight, hydrating formulas — heavy full-coverage foundations settle into fine lines; less is more. Sensitive or acne-prone: non-comedogenic, fragrance-free options; patch-test new products along the jaw for 48 hours.
Coverage is a separate choice from formula: sheer/tinted for “no-makeup” days, medium for daily polish, full for events and photography. Most people need medium — full coverage daily is what creates the mask effect. One well-chosen medium-coverage foundation beats three wrong ones, which is the real money-saving insight: the waste is not the £30 bottle, it is the four £25 bottles bought before it.
Application: Where Good Foundation Goes Bad
Even the perfect shade looks wrong applied badly. Prep: moisturiser first, then primer if your skin needs it (mattifying for oily T-zones, hydrating for dry areas) — foundation grips prepped skin and skips over unprepped. Tools: a damp beauty sponge gives the most skin-like finish for liquids; brushes give more coverage; fingers work fine for sheer formulas (the warmth helps blending). Technique: start at the centre of the face and blend outward — most people need far less product than they use; build in thin layers only where needed rather than applying full coverage everywhere. Set selectively: powder only where you get shiny, not all over — all-over powdering is what turns dewy foundations cakey by 3pm.
The final check is always daylight and always the neck: step to a window, check the jawline blend, and look at your face in your phone’s front camera (unflattering, honest). If you cannot see where foundation ends and skin begins, you have won. For the bigger picture of pulling a look together, our guide to colours that suit pale skin helps the rest of your routine harmonise with your base.
Buying Smart (The Money Part)
Always sample first: most counters and many drugstores offer samples — wear one for a full day before buying the bottle. A shade that looks perfect at 10am can oxidise orange by 4pm; only a wear-test reveals it. Buy at seasonal changes: skin tone shifts between summer and winter; reassess twice a year rather than wearing July’s shade in January. Do not chase the expensive myth: superb foundations exist at every price point — the £10–£15 drugstore options now rival luxury formulas; you are paying for shade range and packaging as much as performance. One at a time: finish (or definitively reject) one foundation before buying the next. The drawer of shame grows one impulse purchase at a time.
And think about the whole canvas: healthy skin needs less foundation, full stop. A simple, consistent skincare routine does more for your base than any bottle — which pairs nicely with building a capsule wardrobe on a budget: the philosophy is identical (fewer, better, chosen deliberately).
Conclusion
Choosing foundation for your skin tone without wasting money comes down to three steps in order: identify your undertone (warm, cool or neutral) using the vein, jewellery and white-fabric tests; match the shade on your jawline in natural daylight, allowing for oxidisation; and choose the formula for your skin type, not the marketing. Sample before buying, reassess seasonally, and remember that the most expensive foundation is the collection of wrong ones. Get the undertone right and everything else gets easier — it is the single highest-leverage move in makeup.
For skin-health authority, see the British Association of Dermatologists and the CTPA’s guidance on cosmetic safety.
Frequently Asked Questions
How do I find my skin undertone?
Use three tests in natural daylight: wrist veins (greenish = warm, bluish = cool), jewellery (gold flatters warm, silver flatters cool), and white fabric held to the face. Two out of three agreeing gives your answer.
Should I test foundation on my hand or face?
Always the jawline — hands are a different colour from faces. Swipe three shades along the jaw, check in natural daylight after five minutes (to allow for oxidisation), and pick the one that disappears.
Why does my foundation look orange?
Almost always a too-warm undertone or oxidisation. Re-check your undertone, try a cooler or more neutral shade, and wear-test for a full day before buying.
Is expensive foundation better than drugstore?
Not necessarily — excellent foundations exist at every price point. Shade range, formula match to your skin type and proper application matter far more than price.