
How to Waterproof a Treehouse Structure: Step-by-Step Guide (2026)
A treehouse lives the hardest life of any garden structure. Unlike a shed, it cannot simply be wrapped in felt and forgotten; it moves with the tree, it is fully exposed to wind-driven rain on all sides, and its most vulnerable points — the places where timber meets living wood — are exactly where waterproofing is hardest to get right. I have seen beautifully built treehouses start rotting at the trunk junction within two summers because the builder treated waterproofing as an afterthought. The good news is that a methodical approach, borrowed from proper roofing and timber-frame practice, will keep a treehouse dry for a decade or more with only light maintenance.
Start With the Roof: Your First and Best Defence
Around 90% of water problems in treehouses are roof problems. A flat or nearly flat roof on an exposed structure is asking for trouble — water ponds, finds the tiniest gap, and sits against timber for days.
Pitch and overhangs
Aim for a roof pitch of at least 15 degrees, and 20–25 degrees is better if you want to use shingles or tiles. Just as important are the overhangs: extend the roof at least 30 cm beyond the walls on all sides, and 45 cm on the windward side if your garden catches driving rain. Those overhangs keep water off the wall cladding and, critically, away from the junction where support beams meet the tree. A surprising amount of rot starts not on the roof but on walls that get soaked because the roof barely covers them.
Roofing materials that work on treehouses
You have several good options, each with trade-offs:
- EPDM rubber membrane: A single seamless sheet, glued down over plywood decking. Lightweight, tough, and ideal for low-pitch roofs. A 1.2 mm EPDM sheet will outlast the treehouse. Cost is roughly £8–£12 per square metre for the membrane.
- Metal roofing (corrugated or standing seam): Excellent for pitched roofs, sheds water fast, and is very light — a real advantage when the structure hangs from a tree. Pre-painted steel panels cost around £15–£25 per square metre.
- Asphalt shingles: Attractive and familiar, but heavier and they need a solid deck plus proper underlay. Fine on a sturdy platform, less ideal on a lightweight build.
- Cedar shingles: Beautiful and naturally rot-resistant, but expensive and they need a steeper pitch (25°+) to shed water reliably.
Whatever you choose, lay a breathable roofing membrane (the same type used under house roofs) over the deck first. It is your second line of defence if wind drives rain under the outer covering. This Old House has a solid primer on roofing underlayment choices that applies just as well to small structures.
Flashing the Trunk: The Hardest Detail
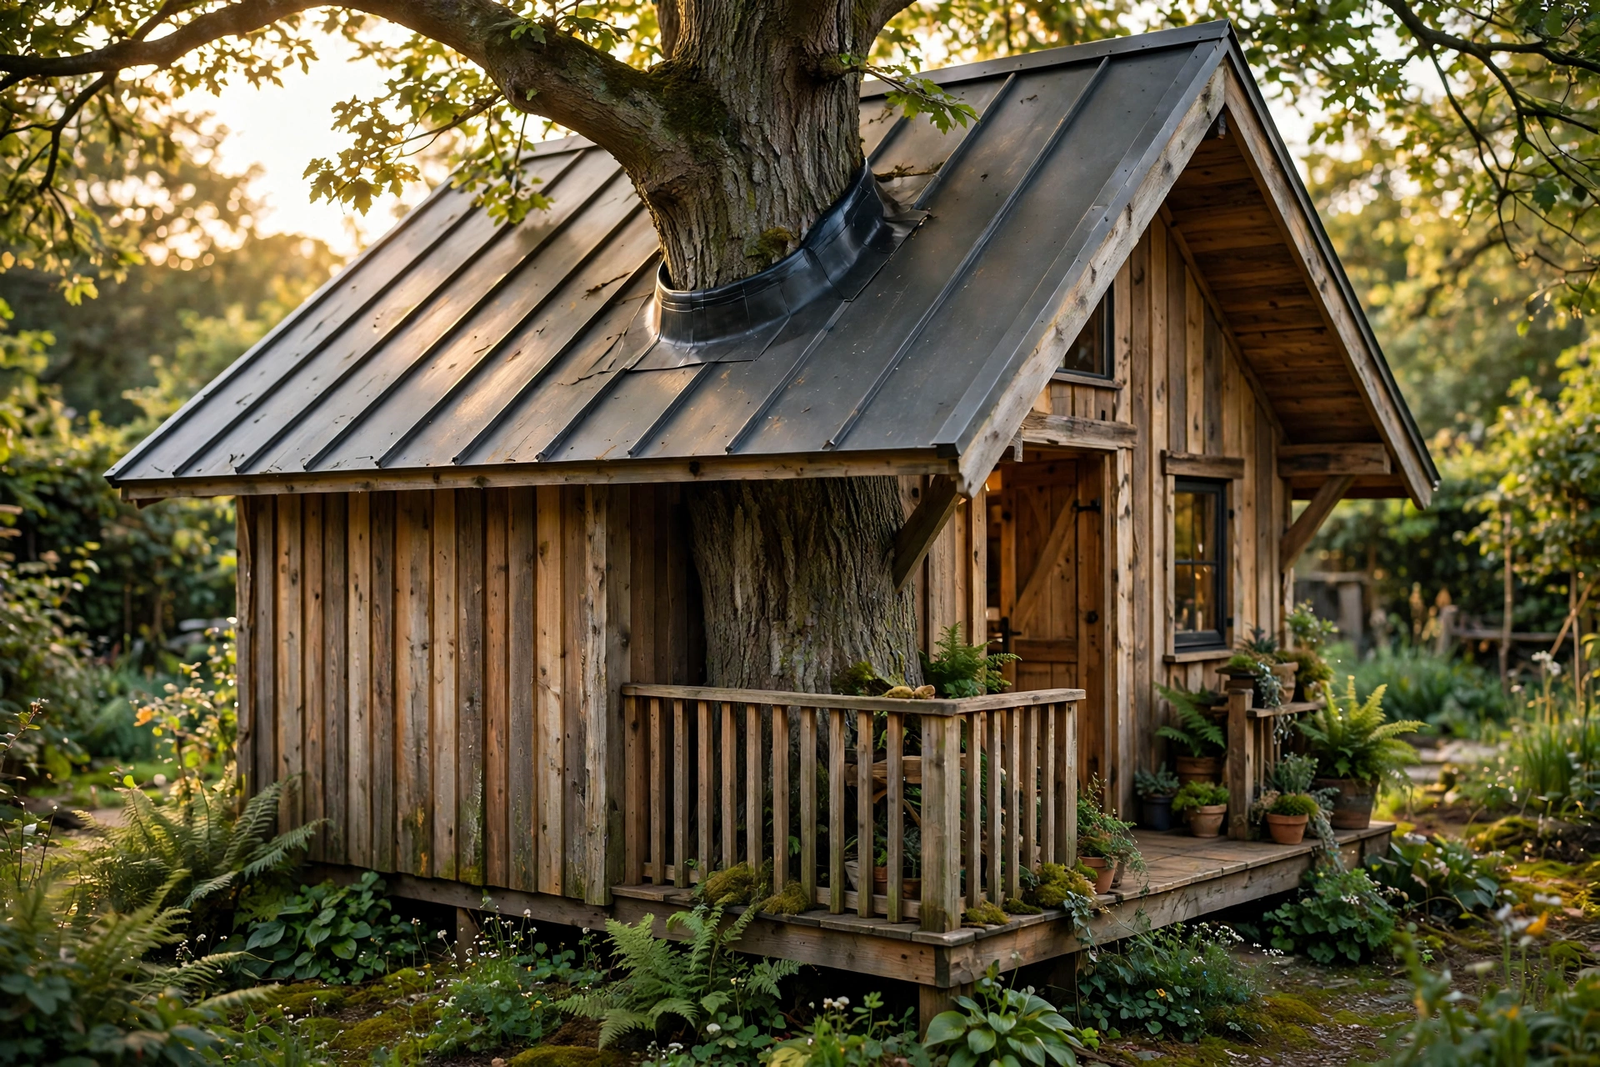
Where the trunk passes through the roof — or where beams bolt to the tree — is the detail that defeats most DIY builders. The tree moves in the wind, grows in girth every year, and has irregular bark that no flat flashing will sit against. Rigid, tight seals here always fail; the answer is flexible, layered flashing with room to move.
The reliable method is a two-part approach. First, cut the roof opening generously — at least 15 cm of clearance around the trunk on all sides, more for fast-growing species. Cover this gap with a flexible flashing collar: EPDM offcuts work brilliantly, lapped up the trunk by 20 cm and out over the roof membrane by 30 cm, sealed with a compatible EPDM adhesive. Second, protect the collar itself with a loose metal “storm collar” — a cone of lead or aluminium flashing that sits around the trunk above the rubber, directing water away without being fixed to the bark. Never nail or screw anything into the trunk for waterproofing; every penetration is a future rot site and damages the tree.
For beam-to-tree connections below the roof, the waterproofing concern is water tracking along the beam into the structure. Slope all horizontal beams slightly outward (2–3 degrees is enough), seal the end grain with an end-grain preservative, and consider how to build a treehouse around the tree trunk“>building the platform around the trunk with proper treehouse attachment bolts rather than notching beams into the bark, which creates permanent water traps.
Walls, Cladding, and Keeping Wind-Driven Rain Out
Treehouse walls get hammered by rain that a house wall would never see, because there are no neighbouring buildings or deep eaves to shelter them. Vertical or diagonal cladding boards shed water far better than horizontal ones, since water cannot sit on the laps. Leave a 5–8 mm ventilation gap behind the cladding (battens over a breathable membrane) so any water that does get behind can drain and dry — this rainscreen principle is exactly how modern timber-frame houses stay dry, just at garden scale.
Seal every joint, corner, and window opening with an exterior-grade flexible sealant — polyurethane or MS polymer, not cheap acrylic caulk, which cracks within a year outdoors. Pay special attention to the bottom of walls where splashback from the platform soaks the lowest boards; a strip of DPC (damp-proof course) material behind the bottom course is cheap insurance.
Treating the Timber
Waterproofing layers keep bulk water out, but the timber itself needs protection against the moisture that inevitably reaches it. Use pressure-treated timber (UC3 or UC4 rated for outdoor use) for all structural members — the greenish tint is the preservative, and it matters. For cladding and decking, apply a water-repellent wood preservative or exterior wood oil every 12–18 months; the “bead test” tells you when it is due — flick water at the wood, and if it soaks in rather than beading, it is time to recoat.
End grain is the sponge of every timber structure: it can absorb water up to 20 times faster than the face of a board. Seal every cut end — post tops, beam ends, joist ends — with an end-grain sealer or two coats of preservative before assembly. This single habit prevents more rot than any other, and it costs almost nothing.
Drainage and Ventilation: The Forgotten Half
Here is the uncomfortable truth most guides skip: no waterproofing is perfect, so your treehouse must also be able to dry out. A sealed-up, unventilated treehouse will grow mould on the inside of the cladding within a season, even if not a drop of rain gets in — warm, moist air from occupants condenses on cold surfaces.
Build in cross-ventilation: small vents or louvres high on two opposing walls let moist air escape. If the treehouse has a floor over an open platform, make sure air can circulate beneath it — never box in the underside with solid boards. Slope the platform deck slightly (about 1:40) so rainwater runs off rather than pooling against the walls, and keep gutters or at least a drip edge on the roof so water does not sheet down the cladding.
For the ground-level picture — because treehouse posts and ladders sit in the wettest zone of all — see how to treat bamboo to prevent mold“>how to treat outdoor timber against mould, which covers the preservative routines that keep ground-contact wood sound.
Step-by-Step Waterproofing Checklist
If you are building from scratch or retrofitting an existing treehouse, work through these in order:
- Roof first: 15°+ pitch, 30–45 cm overhangs, breathable membrane over the deck, then EPDM or metal roofing.
- Flash the trunk: generous clearance, flexible EPDM collar, loose storm collar above. Nothing fixed into bark.
- Cladding: vertical boards over battens with a ventilation gap and breathable membrane behind.
- Seal joints: polyurethane or MS polymer sealant at every corner, window, and penetration.
- Treat timber: pressure-treated structure, end-grain sealer on all cuts, water-repellent coating on cladding.
- Drainage: sloped deck, drip edges, no boxed-in undersides.
- Ventilation: opposing high-level vents so moist air can escape.
- Maintain: annual inspection every autumn — reseal, recoat, and clear debris from the trunk collar before winter.
Common Mistakes That Cause Rot
The failures I see repeatedly: nailing flashing directly into the trunk (it tears within a year as the tree moves); using interior-grade sealant outdoors; boxing in the underside of the platform “to make it look tidy,” which traps moisture; and forgetting the end grain on post tops, which wick water straight down into the structural heart of the build. The family handyman guides at Family Handyman are worth browsing for outdoor timber project waterproofing techniques — the same flashing and sealing logic scales down neatly to treehouse size.
Frequently Asked Questions
Can I waterproof a treehouse with just paint or wood stain?
No — paint and stain are not waterproofing. They slow moisture absorption and look good, but they cannot bridge gaps, seal joints, or keep bulk water out. Think of coating as the final protective layer on top of a proper system: roof membrane, flashing, ventilation gap, and drainage. Coating alone on a leaky structure just traps water underneath and accelerates rot.
How do I waterproof around the tree trunk without harming the tree?
Leave generous clearance (15 cm minimum), use a flexible EPDM collar sealed to the roof but not to the bark, and add a loose metal storm collar above it to shed water. Never drive nails or screws into the trunk for waterproofing, and check the collar yearly — as the trunk grows, you may need to enlarge the opening.
What is the best roofing material for a treehouse in the UK?
EPDM rubber membrane is hard to beat: it handles low pitches, comes in one seamless piece so there are no joints to fail, shrugs off frost, and is light enough for tree-mounted structures. Corrugated or standing-seam metal is the best choice for steeper pitched roofs where you want a traditional look and maximum water-shedding speed.
How often does a treehouse need re-waterproofing?
Plan on an annual autumn inspection: check sealant joints, the trunk collar, and the timber coating. Recoat cladding with preservative or oil every 12–18 months (the water-bead test tells you when). EPDM and metal roofing should last 15–25 years; sealants typically need attention every 3–5 years.
Should I put guttering on a treehouse?
It helps, especially on the side facing the main play area or the ladder — it stops roof runoff sheeting down the walls and soaking the platform. Use lightweight plastic guttering and make sure downspouts discharge well clear of support posts. On very small treehouses, a simple drip edge may be enough.
Will a waterproofed treehouse still get condensation inside?
It can, because condensation comes from warm moist air meeting cold surfaces, not from rain getting in. That is why ventilation matters as much as waterproofing: opposing high-level vents let moist air escape, and avoiding airtight construction lets the structure breathe. On cold mornings a little condensation on single-glazed windows is normal and harmless as long as air can circulate.